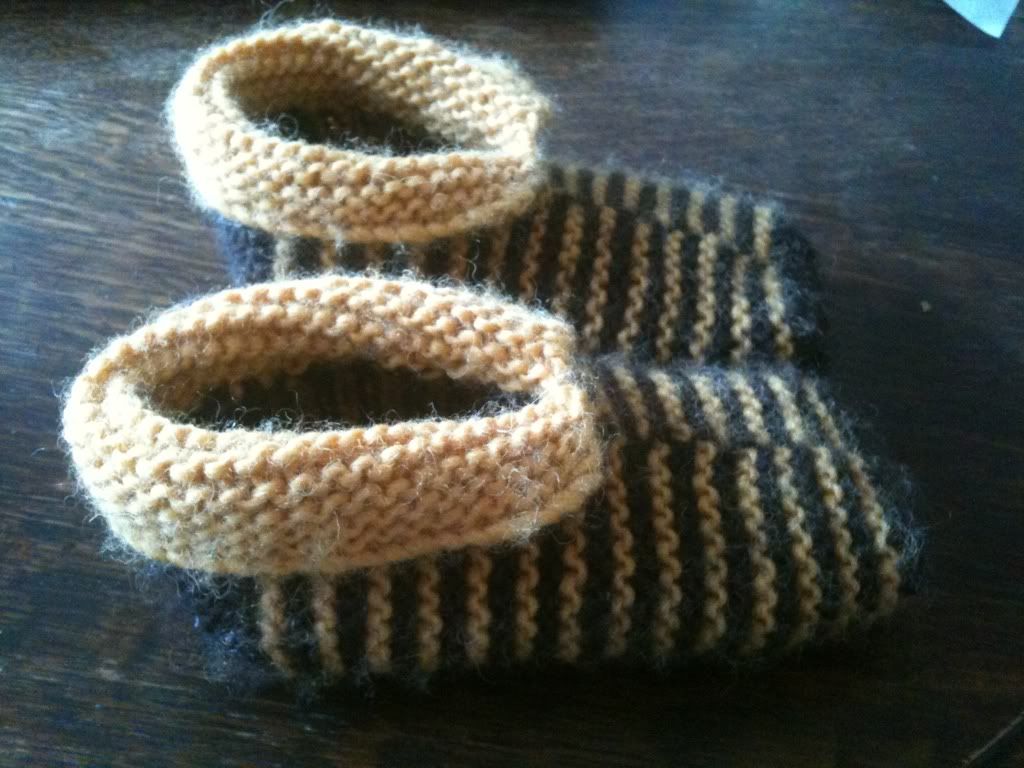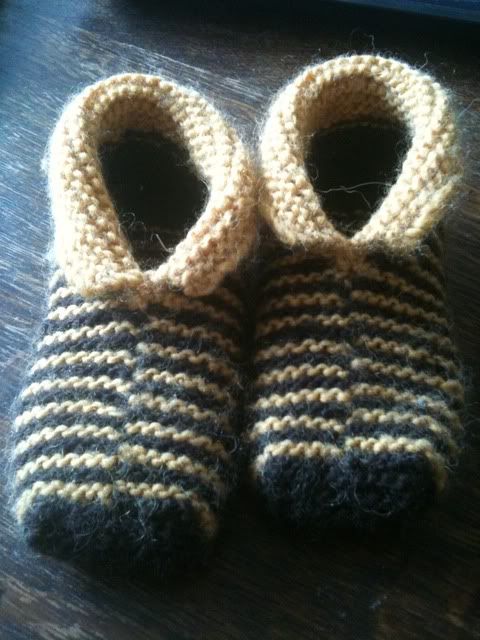
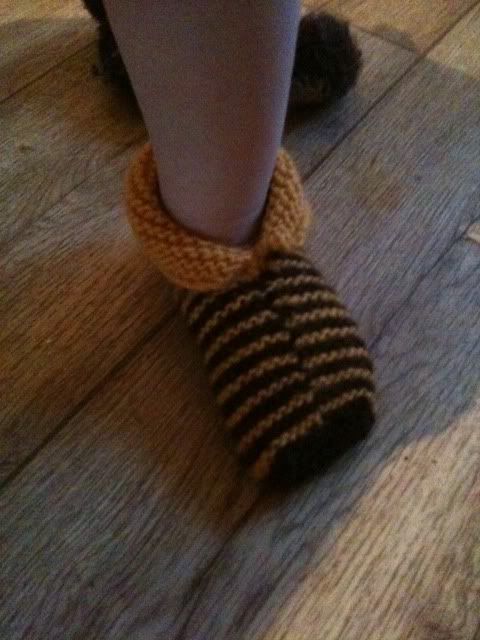
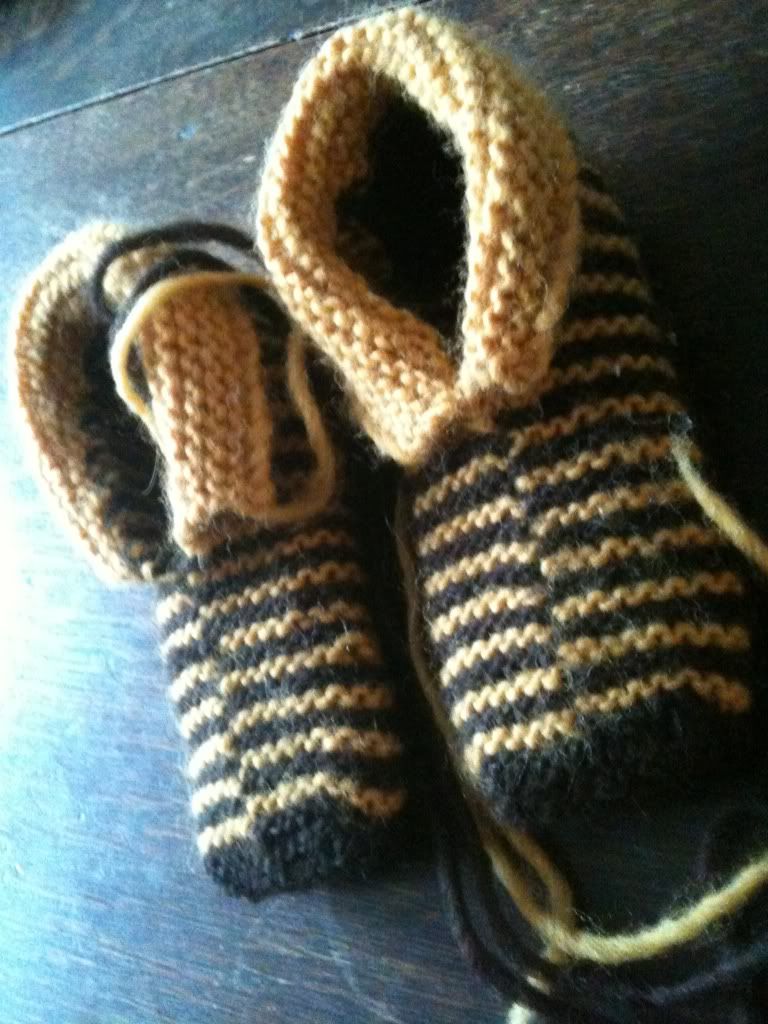
This pattern is designed for toddlers between 1-3 years of age, you can easily adjust the length of the foot to fit. It is worked entirely in one piece using short rows and circular knitting, you will only have to sew two stitches at the end! (ravelry page here)
Materials:
3.5mm circular needle of a length which you might use to magic loop socks (or dpns)
Worsted weight yarn...I used Filz it
Tension...not crucial, but intended to be close enough to give a sturdy fabric
Abbreviations:
w+t = wrap and turn (check a knitting book or youtube if you aren't sure about this as you'll need it to work short rows)
Start at cuff:
Cast on 40 sts and knit 8 rows.
Work each of the following rows TWICE so that the shaping will be symmetrical:
k to last 4 sts, w&t
k to last 8 sts, w&t
k to last 12 sts, w&t
k to last 16 sts, w&t
Now prepare to knit the heel:
k to last 20 sts, w&t, and k to end of row.
k 1 row
k14, change to cc, k12 (do not break off mc, it will be in the right place to start the stripe pattern)
On these centre 12 sts only, work to and fro in garter stitch for around 19 rows, or until it is pretty much square, ending with a right side row (a little like you would for a sock heel).
Now the foot:
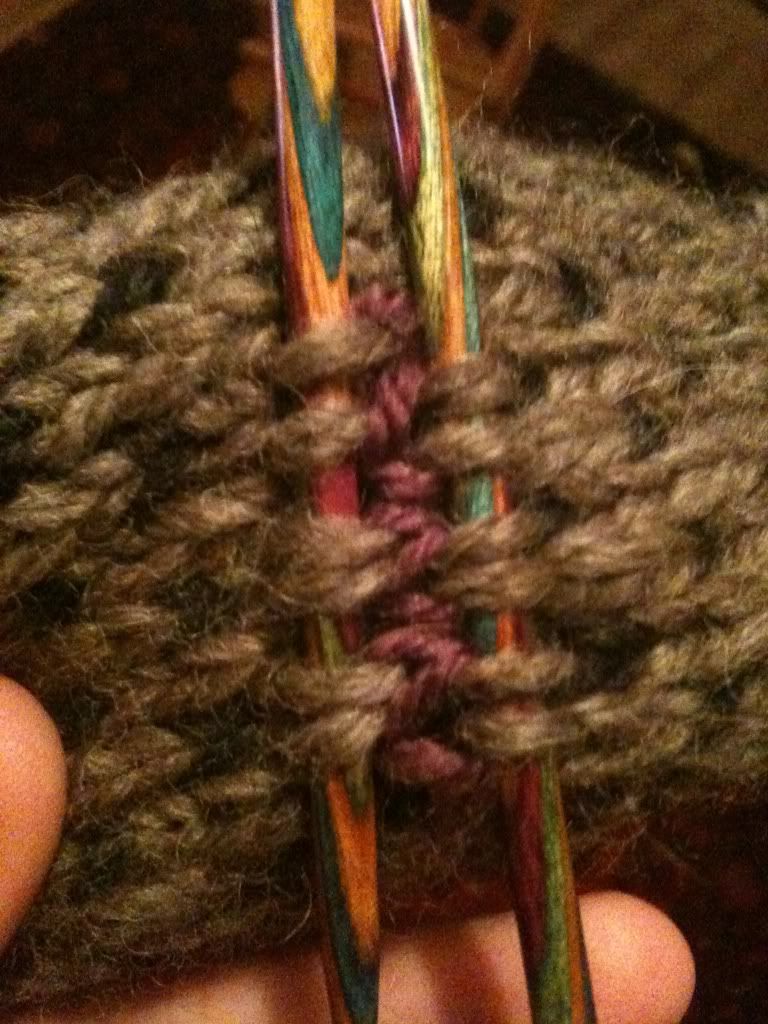
Pick up 9 sts up left side of heel. Put last st picked up back onto left needle, and knit it together with the first st of the held cuff sts. Turn.
k21, pick up 9 sts from other side of heel. Put last st back onto left needle, and knit it together with the first st of the held cuff sts. Turn and change to MC
*K to the last of the foot sts, k this last st tog with the first of the cuff sts, turn.
Repeat the row above, turn and change to other yarn colour*
Repeat the 2 rows between the *'s until all the cuff sts have been knitted in, and 30 sts remain in total.
Now continue working in g st, changing colour as before, but working in the round and therefore purling what would have been the wrong side rows. Continue until foot is the same length as your child's foot, including the toes, ending with a p row in CC. Break of MC.
Shape toe (note - this style of toe gives depth rather than length)
k4, k2tog, turn
k9, k2tog, turn
repeat the previous row until 20 sts remain in total.
turn the work inside out so that there are 10 sts on each needle, and work a 3 needle bind off.
Weave in ends, using the cast on tail to work a couple of sts to bring the cuff edges together where they meet the foot.
Showing posts with label Patterns. Show all posts
Friday, 11 February 2011
Monday, 24 January 2011
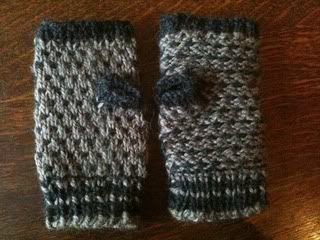
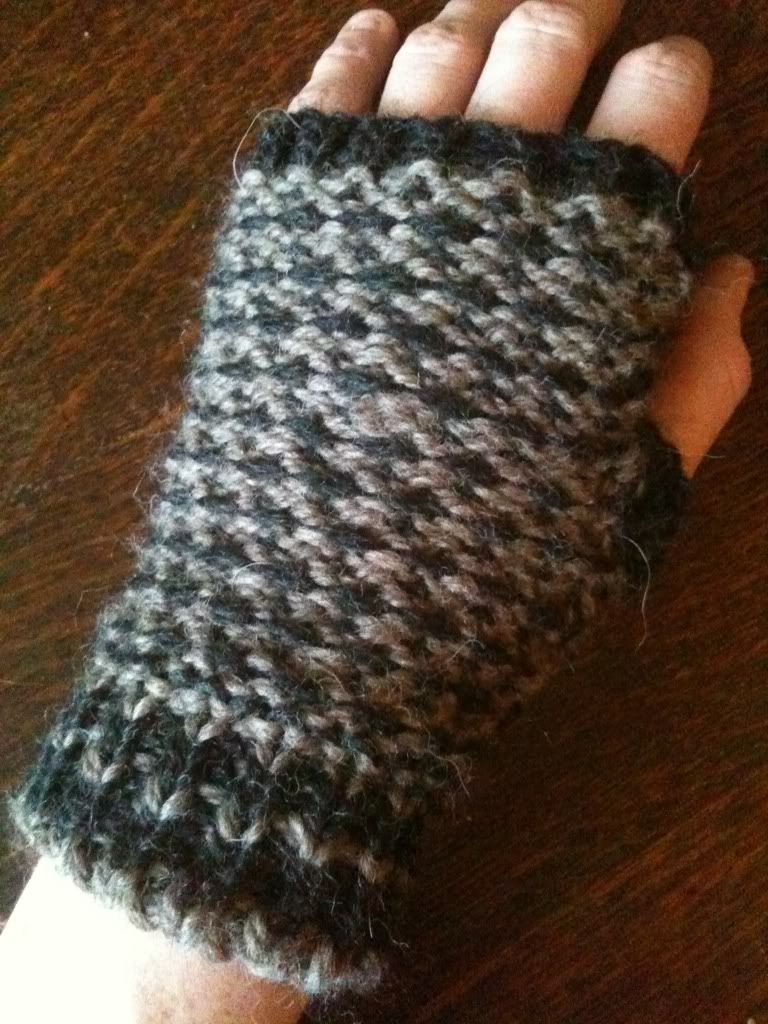
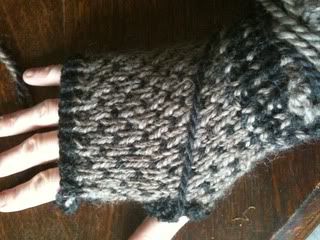
simple reversible fingerless gloves
4mm and 5mm circular needles
some scrap yarn
Other notes can be found at bottom of page if you don't like my terse pattern!
CO 32 with A. Working in 1x1 rib, work
3 rounds B
1 round A
2 rounds B
1 round A
1 round B
1 round A
Change to 5mm needles and continue in st st
With A, knit two rounds plain
With B, *sl 1 pwise, k1* to end
With A, knit two round plain
With B, *k1, sl 1 pwise* to end
work the rounds in bold a total of 3 times.
With A, knit 1 round plain***
with scrap yarn, k 6, sl these 6 sts back onto left handle needle
Knit 1 round plain
###With B, *sl 1 pwise, k1* to end
With A, knit two rounds plain
With B, *k1, sl 1 pwise*
Now repeat the rounds in bold one more time
With A, knit two rounds plain
Change to 4mm needles
With B, work 3 rounds 1x1 rib and cast off.
Thumb:
Unpick waste yarn, and working in 1x1 rib, pick up and work the 6 sts hanging from base of hole, pick up and work 2 sts from side of hole, pick up and work 6 sts along top of hole, pick up and work 2 sts down final side of hole. Work 3 rows 1x1 rib, cast off.
Other hand:
Work as for first glove to ***.
With A, k 10, change to scrap yarn, k 6, sl these 6 sts back onto left needle, finish knitting round with A.
Continue as for first glove from ###
- A stretchy cast on is good, eg. tubular, or I just used an alternate cable cast on where sts are cast on k or pwise alternately, and then worked as they appear on the first rib row to establish patt, which is almost as good as tubular
- when carrying yarn for the sl st rows, ensure tension remains fairly loose or elasticity of knitting will be affected
- cast off in rib or some other way which allows give
- when about to cut the scrap yarn to pick up for the thumb, you may wish to do this first:
to save fiddling about trying to catch stitches which have slipped away from you, which can be esp tricky with a sl st pattern so worth doing IMO
Thursday, 11 November 2010
Reversible waistcoat/vest for a toddler
Here is a pattern for a simple waistcoat or vest for a toddler. I knitted it for my 18 month old, but it has lots of stretch and a bit of extra length so I think it's going to fit for a loooooong time.


Cast on 124 sts with 4mm needles and work in 1x1 rib for about an inch. Change to 5mm needles. Keep first and last 5 sts in 1x1 rib, but on every right side row just knit all the other sts. This will create a broken rib pattern which looks like stretchy ribbing on one side

And creates this interesting texture on the other side

The best thing is it has all the stretch of ribbing, but you get to knit every other row which makes it go a bit quicker!
Continue working in broken rib with the knitted in button bands until you get to where you want the underarms to be, ending with a ws row. I did about 7".
Now, rib 5 and work 27 more sts in patt. Continue as before on these 32 sts only until about 4.25" from armpit divide, ending with a wrong side row.
Now, work 13 sts, k2tog, work to end of row.
Purl 16, p2tog, turn leaving first 13 sts on holder
K2tog, k to end
P14, p2tog
[k2tog, k to end. Work wrong side row without shaping]
Rep rows in [] til 13 sts remain, leave on holder.
Rejoin wool at opposite side and reverse shapings to create second side.
Rejoin to centre sts and just work straight until length matches sides. Cast off 13 sts on next 2 rows, leave remaining sts on a holder.
It isn't really necessary to do anything to the armholes as long as your tension is ok. You could add some ribbing or something, but it wouldn't really be reversible then.
Graft shoulder stitches, or hold stitches from each shoulder and cast off the usual way but which two together, one from each needle, if you know what I mean. Grafting would be neater but you might be lazy like me.
Rejoin yarn at neck edge on right side. With 4mm needles, pick up and knit (keeping patt correct) the 13sts left on holder, pick up an even number of sts evenly along neck shaping, knit accross back neck sts, pick up down left neck and final 13 sts on the final holder. Work about 5 rows in 1x1 rib and bind off carefully in rib.
You could add some button loops and toggles which would keep it reversible. I might do that but at the moment I like that abi can easily take it off herself. It's just a sloppy, easygoing kind of garment. I want one please, you have no idea how good and squishy this yarn is, my photos do it no justice.
Here it is bobbly side out...


And smooth side out (which I slightly prefer)...


Posted using BlogPress from my iPhone


Cast on 124 sts with 4mm needles and work in 1x1 rib for about an inch. Change to 5mm needles. Keep first and last 5 sts in 1x1 rib, but on every right side row just knit all the other sts. This will create a broken rib pattern which looks like stretchy ribbing on one side

And creates this interesting texture on the other side

The best thing is it has all the stretch of ribbing, but you get to knit every other row which makes it go a bit quicker!
Continue working in broken rib with the knitted in button bands until you get to where you want the underarms to be, ending with a ws row. I did about 7".
Now, rib 5 and work 27 more sts in patt. Continue as before on these 32 sts only until about 4.25" from armpit divide, ending with a wrong side row.
Now, work 13 sts, k2tog, work to end of row.
Purl 16, p2tog, turn leaving first 13 sts on holder
K2tog, k to end
P14, p2tog
[k2tog, k to end. Work wrong side row without shaping]
Rep rows in [] til 13 sts remain, leave on holder.
Rejoin wool at opposite side and reverse shapings to create second side.
Rejoin to centre sts and just work straight until length matches sides. Cast off 13 sts on next 2 rows, leave remaining sts on a holder.
It isn't really necessary to do anything to the armholes as long as your tension is ok. You could add some ribbing or something, but it wouldn't really be reversible then.
Graft shoulder stitches, or hold stitches from each shoulder and cast off the usual way but which two together, one from each needle, if you know what I mean. Grafting would be neater but you might be lazy like me.
Rejoin yarn at neck edge on right side. With 4mm needles, pick up and knit (keeping patt correct) the 13sts left on holder, pick up an even number of sts evenly along neck shaping, knit accross back neck sts, pick up down left neck and final 13 sts on the final holder. Work about 5 rows in 1x1 rib and bind off carefully in rib.
You could add some button loops and toggles which would keep it reversible. I might do that but at the moment I like that abi can easily take it off herself. It's just a sloppy, easygoing kind of garment. I want one please, you have no idea how good and squishy this yarn is, my photos do it no justice.
Here it is bobbly side out...


And smooth side out (which I slightly prefer)...


Posted using BlogPress from my iPhone
Tuesday, 9 November 2010
Legging longies


I came up with this pattern because I wanted some longies which would not drag on the ground now my daughter can walk. I don't find the common baggy style very practical. Also, I thought this style would look nice under a dress, more like tights. I've linked to the pattern on ravelry here
It is worked in double knit as I didn't want them to be bulky seeing as they are quite fitted. I worked them on straights because I find knitting in the round tedious, but you could easily work it in one piece if you are so inclined. Specific leg/rise measurements are not given because using your child will give a better fit.
The snug fit at the ankles means you can get away with making them a bit too long as well to allow for growth. There is a lotnof room for a big bottom though...we often use them over a soaker as well when out and about. They fitted fine when I made them for my 16 month old, and look like they will fit for a long time to come! Which is good because it felt like they took a long time to knit, but I was a bit nervous about how they'd come out. Well, I think they're perfect! There's a few short rows and I made an elastic waistband but you could easily do a drawstring instead. Length of leg etc would also be easily adjustable. They have a big big behind, if you have a skinny baby you might like to decrease a little before the waistband to reduce bulk. My baby is chubby and doesn't mind.

Longies
Co 36 on 3.25 mm with dk and work 1x1 rib for 2 inches
Change to 3.75 and k 1 row, incing 4 STs evenly across the row (40)
P one row
* Inc one st at beg and end of next row
Work three rs st st
Rep from * to 80 sts then cont straight til reqd length.
Co 2 sts at beg of next 2 rs for crotch and work 2 rs straight.
K 38, wrap, turn and p back to end.
K 36, wrap, turn and p to end
Cont working short rows dec by 2 sts each time until final short row
of 24 sts.
Cont straight on all sts til you have the desired rise. Then change back to 3.25 mm k one row on the wrong side to make a neat ridge for turning. Knit straight for about an inch and a half and cast off.
Make another leg the same but reversing the short row shaping and join them together!


Posted using BlogPress from my iPhone
Thursday, 4 November 2010
Crocheted horsey reins
Here is a pattern for some crocheted horsey reins inspired by some finger knitted ones I've seen. I haven't written a crochet pattern before so hope it's ok.


Worked in dk with a 4mm hook. When changing colour remember to finish previous st with new colour:

And carry old colour acroos previous row, trapping it under new stitches:

Make 27 ch, htr into 3rd ch. Htr in each ch along (25 htr)
2ch, 3htr in red,* 5htr in blue, 2htr in red, rep from * twice more, 1htr in red
Work the above row once more
2ch, 1 htr. In next st, work 1 htr but don't pull loop through to complete stitch, work another htr in next st but to finish pull yarn through all 5 loops on hook (htr2tog). I htr in next st,* change to blue, 3 htr, change to red, 4 htr
rep from * once more, change to blue, 3 htr, change to red, 1 htr, htr2tog, 1 htr.
2ch, 1 htr, htr2tog, *change to blue, 3htr, change to red, 4 htr, rep from * once more, change to blue, 3 htr, change to red, htr2tog, 1htr.
2ch, htr2tog, 1 htr, * change to blue, 1htr, change to red, 6 htr, rep from * once more, change to blue, 1 htr, change to red, 1htr, htr2tog.
2ch, 1htr in each st, fasten off.
Ta da:

Rejoin yarn at either bottom corner, make a ch which will easily fit round your childs chest, and slip st to other corner, being careful not to twist the chain.
Work 4 ss evenly up side of main piece. Now, working into the long chain, work 3dtr, 3tr, htr accross to last 6 ch and reverse first 6 sts worked. Ss to main piece.
Ss about a stitch above into main piece, work 1 dc into each st back along strap. Ss to main piece and fasten off.
Rejoin at top right corner and work a ch long enough to make a comfortable shoulder strap. Ss to opposite point on back strap, work 2 ss along back strap, and then htr back along shoulder strap to last 6 sts, work 3tr, 3dtr,ss to main piece and fasten off. Repeat for other shoulder.
With contrast yarn and slightly smaller hook work 1 row dc all around all straps and edges. Work 3dctog over inside corners for a neat finish and extra strength

Now with 2 strands tog make a chain long enough to be the rein. Use both ends of wool to attach the reins, making sure to anchor them as securely as possible.
Sew in all the ends and that's that.

Posted using BlogPress from my iPhone


Worked in dk with a 4mm hook. When changing colour remember to finish previous st with new colour:

And carry old colour acroos previous row, trapping it under new stitches:

Make 27 ch, htr into 3rd ch. Htr in each ch along (25 htr)
2ch, 3htr in red,* 5htr in blue, 2htr in red, rep from * twice more, 1htr in red
Work the above row once more
2ch, 1 htr. In next st, work 1 htr but don't pull loop through to complete stitch, work another htr in next st but to finish pull yarn through all 5 loops on hook (htr2tog). I htr in next st,* change to blue, 3 htr, change to red, 4 htr
rep from * once more, change to blue, 3 htr, change to red, 1 htr, htr2tog, 1 htr.
2ch, 1 htr, htr2tog, *change to blue, 3htr, change to red, 4 htr, rep from * once more, change to blue, 3 htr, change to red, htr2tog, 1htr.
2ch, htr2tog, 1 htr, * change to blue, 1htr, change to red, 6 htr, rep from * once more, change to blue, 1 htr, change to red, 1htr, htr2tog.
2ch, 1htr in each st, fasten off.
Ta da:

Rejoin yarn at either bottom corner, make a ch which will easily fit round your childs chest, and slip st to other corner, being careful not to twist the chain.
Work 4 ss evenly up side of main piece. Now, working into the long chain, work 3dtr, 3tr, htr accross to last 6 ch and reverse first 6 sts worked. Ss to main piece.
Ss about a stitch above into main piece, work 1 dc into each st back along strap. Ss to main piece and fasten off.
Rejoin at top right corner and work a ch long enough to make a comfortable shoulder strap. Ss to opposite point on back strap, work 2 ss along back strap, and then htr back along shoulder strap to last 6 sts, work 3tr, 3dtr,ss to main piece and fasten off. Repeat for other shoulder.
With contrast yarn and slightly smaller hook work 1 row dc all around all straps and edges. Work 3dctog over inside corners for a neat finish and extra strength

Now with 2 strands tog make a chain long enough to be the rein. Use both ends of wool to attach the reins, making sure to anchor them as securely as possible.
Sew in all the ends and that's that.

Posted using BlogPress from my iPhone
Sunday, 24 October 2010
Knitted and felted bells for your Tree
I'm a bit obsessed with Xmas so made this wee pattern up. Maybe someone else will like it, maybe not, but I'm plonking it here anyway!

Use 100% wool and needles to give fairly loose tension.
Cast on 30, work 2 rs st st.
*k1, k2tog* to end, 20 sts.
Work 13 rows st st.
*k2tog* to end, 10 sts
Purl 1 row
*k2tog* to end, 5 sts. Cut long tail, thread through and pull up 5 loops and sew seam. It won't look amazing.

You could knit it in the round if you enjoy that sort of thing. Now felt it in the washing machine at at least 40 degrees c. Pull into shape esp around base before drying. Add loop and maybe a wee bell.
There you are, bells for your tree.

- Posted using BlogPress from my iPhone

Use 100% wool and needles to give fairly loose tension.
Cast on 30, work 2 rs st st.
*k1, k2tog* to end, 20 sts.
Work 13 rows st st.
*k2tog* to end, 10 sts
Purl 1 row
*k2tog* to end, 5 sts. Cut long tail, thread through and pull up 5 loops and sew seam. It won't look amazing.

You could knit it in the round if you enjoy that sort of thing. Now felt it in the washing machine at at least 40 degrees c. Pull into shape esp around base before drying. Add loop and maybe a wee bell.
There you are, bells for your tree.

- Posted using BlogPress from my iPhone
Wednesday, 25 August 2010
A simple vintage style pyjama case

I have a love hate thing with the sewing machine. It can do magic stuff, but wants you to believe it will be simpler than it ends up being (this is prob just me.)
Anyway I suddenly had the idea for this today and it filled the urge to sew. It is very easy indeed, just straight lines. It took about half an hour of the babys nap, leaving me time to wash up too, oh yay.

Lay out fabric and mark a rectangle with proportions of 3:1. I drew round this book 3 times.
Fold fabric along long edge and cut out, so you now have a rectangle of 3:2. I found the iron at this point!

Rootle through your ribbon tin

Mmmmmmmm
Fold the fabric in half lengthwise, rs together, and pin trimming inside one short edge.

Sew it in, turn at the corner and carry on along about halfway down the long edge.

Now sew up the other end and up the side, leaving a few inches to turn rs out. Press.
Fold the end with trim up a bit. About this much.

Fold the other end down about this much

Sew a seam down either side, turn rs out and you are finished!

You could make it in a more interesting shape. I probably couldn't though!
Posted using BlogPress from my iPhone
Monday, 23 August 2010
Tubular knitted pencil pocket


Here is a little pattern for a pocket on a necklace for any other toddlers who, like my girl, love to cart pencils around the house with them.
It's made slightly more interesting for the knitter by being worked in tubular knitting, where both sides are worked at once on two needles...it's magic! Apparently you can even knit socks this way.
Anyway.
Cast on 22 sts (or any even number) on needles of an appropriate size. I used twilleys dk on 4mms. Now work as follows:
K1, yf, sl 1 pw, yb.
And just carry on like that to the end. Then turn and exactly the same, so you'll be knitting the slipped sts of the previous row and vice versa. Make sure to bring the yarn forward for each sl st or the sides will end up tethered.
After an inch or so you'll be able to do this

to make sure you haven't knitted a sl st or something. Worth checking every once in a while (guess how I know!)
When it is as long as you need it to be, it is of course time to cast off, which requires a spare needle.

Knit the first st. Sl the next st onto the spare needle, and knit the next st. Pass the 1st over the one just knitted as you usually would. Just carry on like this, putting the sts belonging to the other side onto the holder whilst casting off those facing you. It will look a bit like this:

Once you only have sts left on the holder, you can cast those off like usual. Then you're done! Just make a chain or cord so your little one can carry their pencil of choice hands free (obviously keep an eye out to make sure they don't strangle themselves).
I'm quite liking the way it looks inside out


And am tempted to knit a looser one and then felt it in the washing machine. Felting is an addiction, you see.
- Posted using BlogPress from my iPhone
Subscribe to:
Posts (Atom)